Getting started
The quickest route from sign-up to your first confirmed roster.
What it looks like
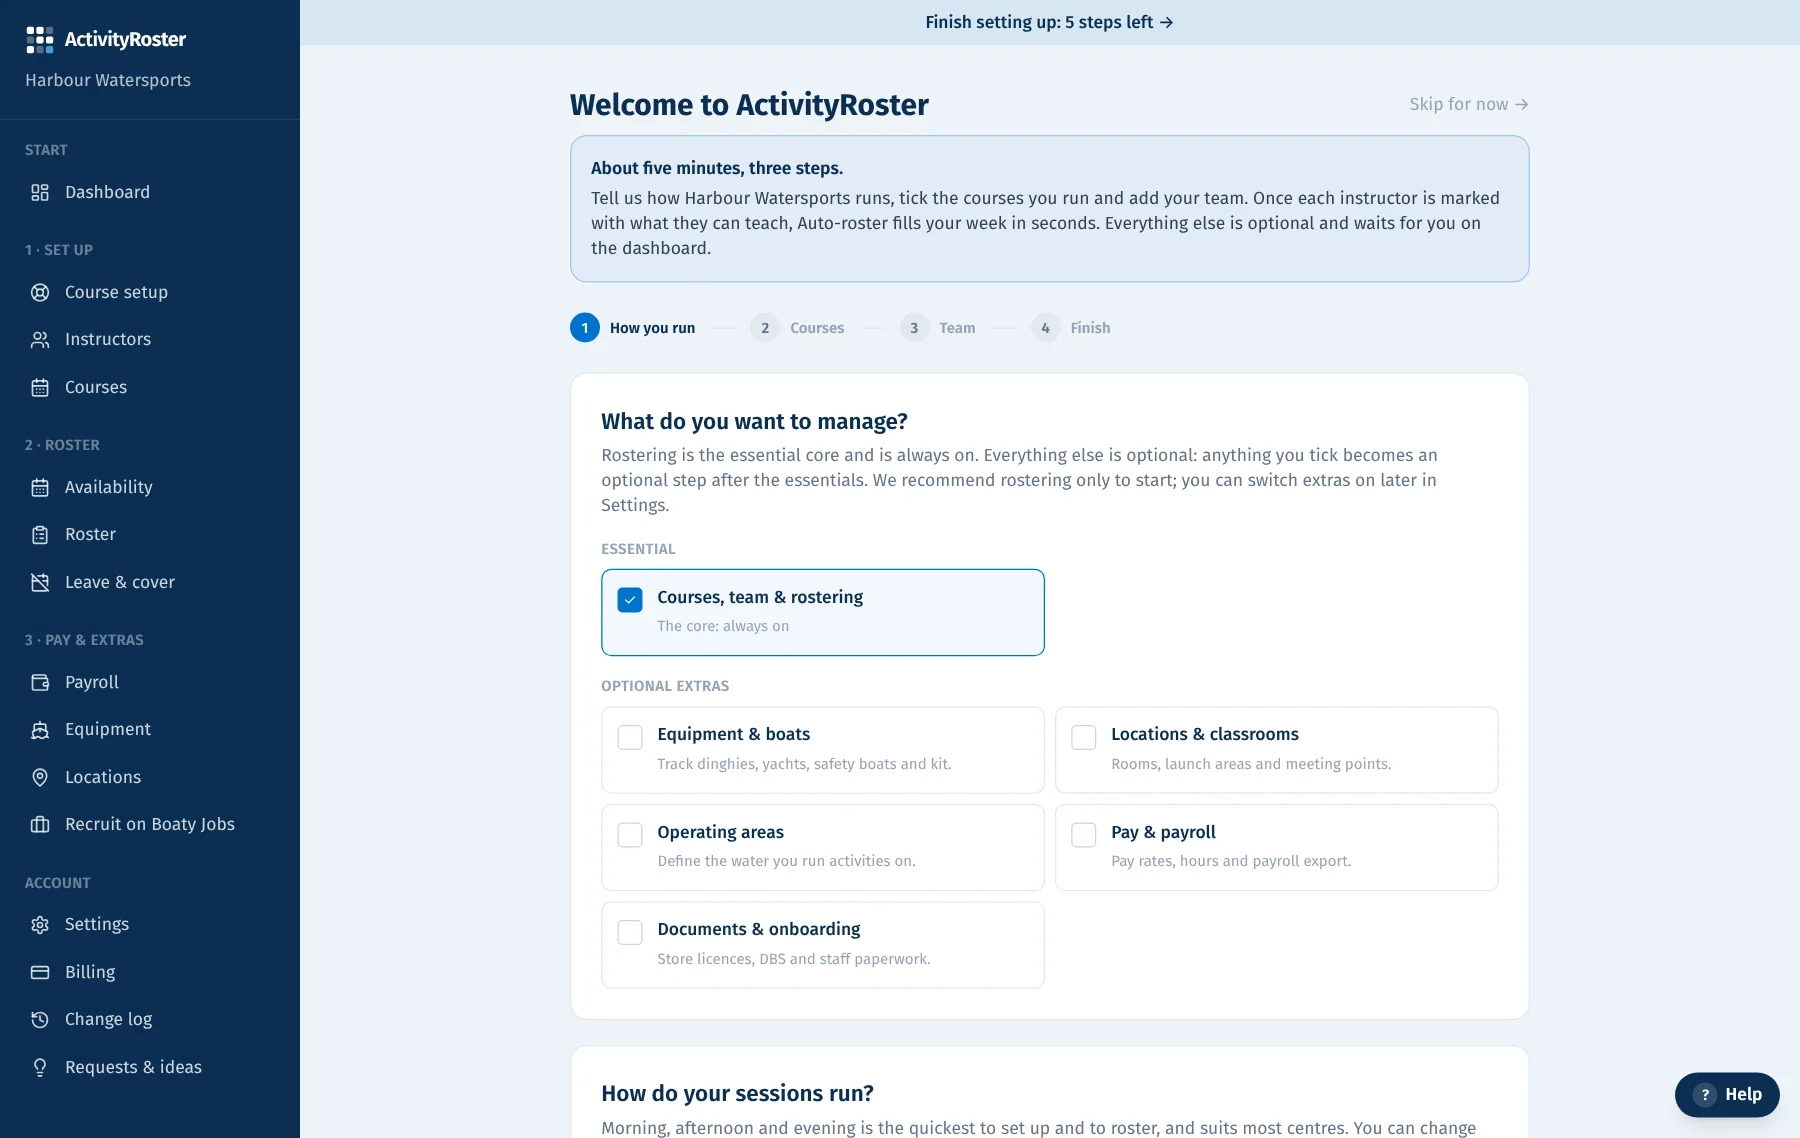
Screens from a made-up centre. Click any screen to see it full size.
Sign up with your centre's name, web address, email and password. We email you a confirmation link: click it, choose a 4-digit PIN, and you're in. There's no second code to enter that first time. You land on the setup wizard.
The quickest route to your first roster
- 1Sign up and choose your PIN.
- 2Run the setup wizard: tick every course you will ever run, then add your team with each person's instructor types.
- 3Invite your team, and send them the ready-made message on your team chat so they know the invite is real.
- 4Put your courses on the calendar: connect your booking system, import a spreadsheet, or add them by hand. Add the whole season.
- 5Build the first roster: check availability, press Auto-roster, and fill any gaps.
- 6Check that licences have expiry dates, then confirm each day. Everyone on it gets a message.
- 7Later: pay rates (before your first pay run), the optional extras, other office admins, and a plan before the trial ends.
Your dashboard shows these steps as a Getting started checklist, ticks them off as your data goes in, and marks the next one. If three days pass with no day confirmed, a reminder points you to the roster. The office menu on the left follows the same order: Set up (Course setup, Instructors, Courses), then Roster, then Pay & extras, then Account.
At sign-up you said what kind of centre you run: an RYA centre or school (that includes clubs), or a PADI dive centre. That choice set up your starting lists (courses, instructor types and who can teach what, kit and checks) and the words you see; the platform underneath is the same for everyone. Every list is yours to change.
The setup wizard, step by step
- 1How you run. Rostering is the essential core and always on. The extras are optional: anything you tick becomes an optional step after the essentials. We recommend rostering only to start. Then choose Morning / afternoon / evening sessions (recommended: quickest to set up and roster) or set start and end times, and whether staff use the app (recommended) or the office runs availability. Leave the availability window at 4 weeks.
- 2Courses. Tick every course you will ever run, across the whole year, not just this month's. Each comes with its staffing and ratios set; add your own for anything not listed.
- 3Team. This step saves you the most time later. Add everyone and tick every instructor type each person holds: Auto-roster only places people on courses their types allow; someone with no type ticked can't be checked, so it could put them on any course. Leave “Email them an invite” ticked. More than about five people? Import them from a spreadsheet.
- 4Invite. Invites come from ActivityRoster rather than from you, so they're easy to ignore or miss in spam. Copy the ready-made message and send it on your team chat: it says the invite is real, to check spam, the date to finish by, and your centre code for anyone whose email went astray.
- 5Onboarding. Choose whether each instructor's page shows an onboarding checklist. Keep the recommended steps; most tick themselves.
- 6Roster PDF. Keep the default layout, or upload an example of the roster you use today (a PDF or a photo) and we'll set up your downloadable roster in the same style.
- 7Finish. Choose your PIN if you haven't yet, then put your courses on the calendar, or load the example week to see a working roster first. Any optional extras you switched on are listed here, marked Optional.
See a working roster first: the example week
Not ready to add your own courses yet? Press “Load an example week” on the wizard's finish step or in the dashboard's Getting started box. Six made-up instructors (each marked “example”) and a week of sessions from your ticked courses go on the roster, starting today, and Auto-roster fills them. Try everything on it: drag people around, confirm a day, print the PDF, open payroll. Nothing in it is real and nobody is emailed.
When you're ready, press “Clear the example” on the dashboard or the roster. It removes exactly what the example added (its people, courses, sessions, shifts and hours) and nothing you added yourself. A day you confirmed while only the example was on it goes back to unconfirmed.
Instructors under 18
Every staff profile has a date of birth. Anyone under 18 is flagged automatically (the flag lifts on their 18th birthday) and their profile gains a parent or guardian emergency contact. Phone numbers and emails of under-18s are shown only to centre admins; colleagues see names and shift times, and under-18s are never offered the option to share their contact details. Rostering treats under-18s like anyone else: young workers' hours and school times are managed by your centre. Every staff member also has an emergency contact, stored encrypted and visible to admins only, with each view written to your change log.
Your privacy notice
You are the data controller for your staff's details; ActivityRoster processes them for you. Add a link to your own privacy notice under Office → Settings and it appears beside ours for every member of your team. Need wording? We publish a template notice for staff and a plain-English version for under-18 instructors in our documentation; ask us for a copy.
Coming back to sign in
Your centre lives at its own address, yourcentre.activityroster.com, and you can bookmark it. You never need to remember it, though: the Sign in link on the website takes your email and password, and your email tells us which centre you belong to and whether you open the office or your portal. If you belong to more than one centre, you choose after signing in.
Centre admins sign in with email and password. When your account is used somewhere new (a country or town it hasn't signed in from before) we email a 6-digit code to enter; a new computer or browser in a place you already work from is let straight through, and we email you to say so (if you've turned on two-factor, that step counts instead; arriving from an invitation or emailed sign-in link counts too, since the link already proved your email). Then you choose whether to stay signed in on that device. Pick "just this once" on a shared computer and you're signed out when the browser closes. You're asked for your 4-digit PIN after 30 minutes without activity, and after 12 hours away you sign in again from the start.