Courses & sessions
Build a course with any pattern of sessions across days and times.
What it looks like
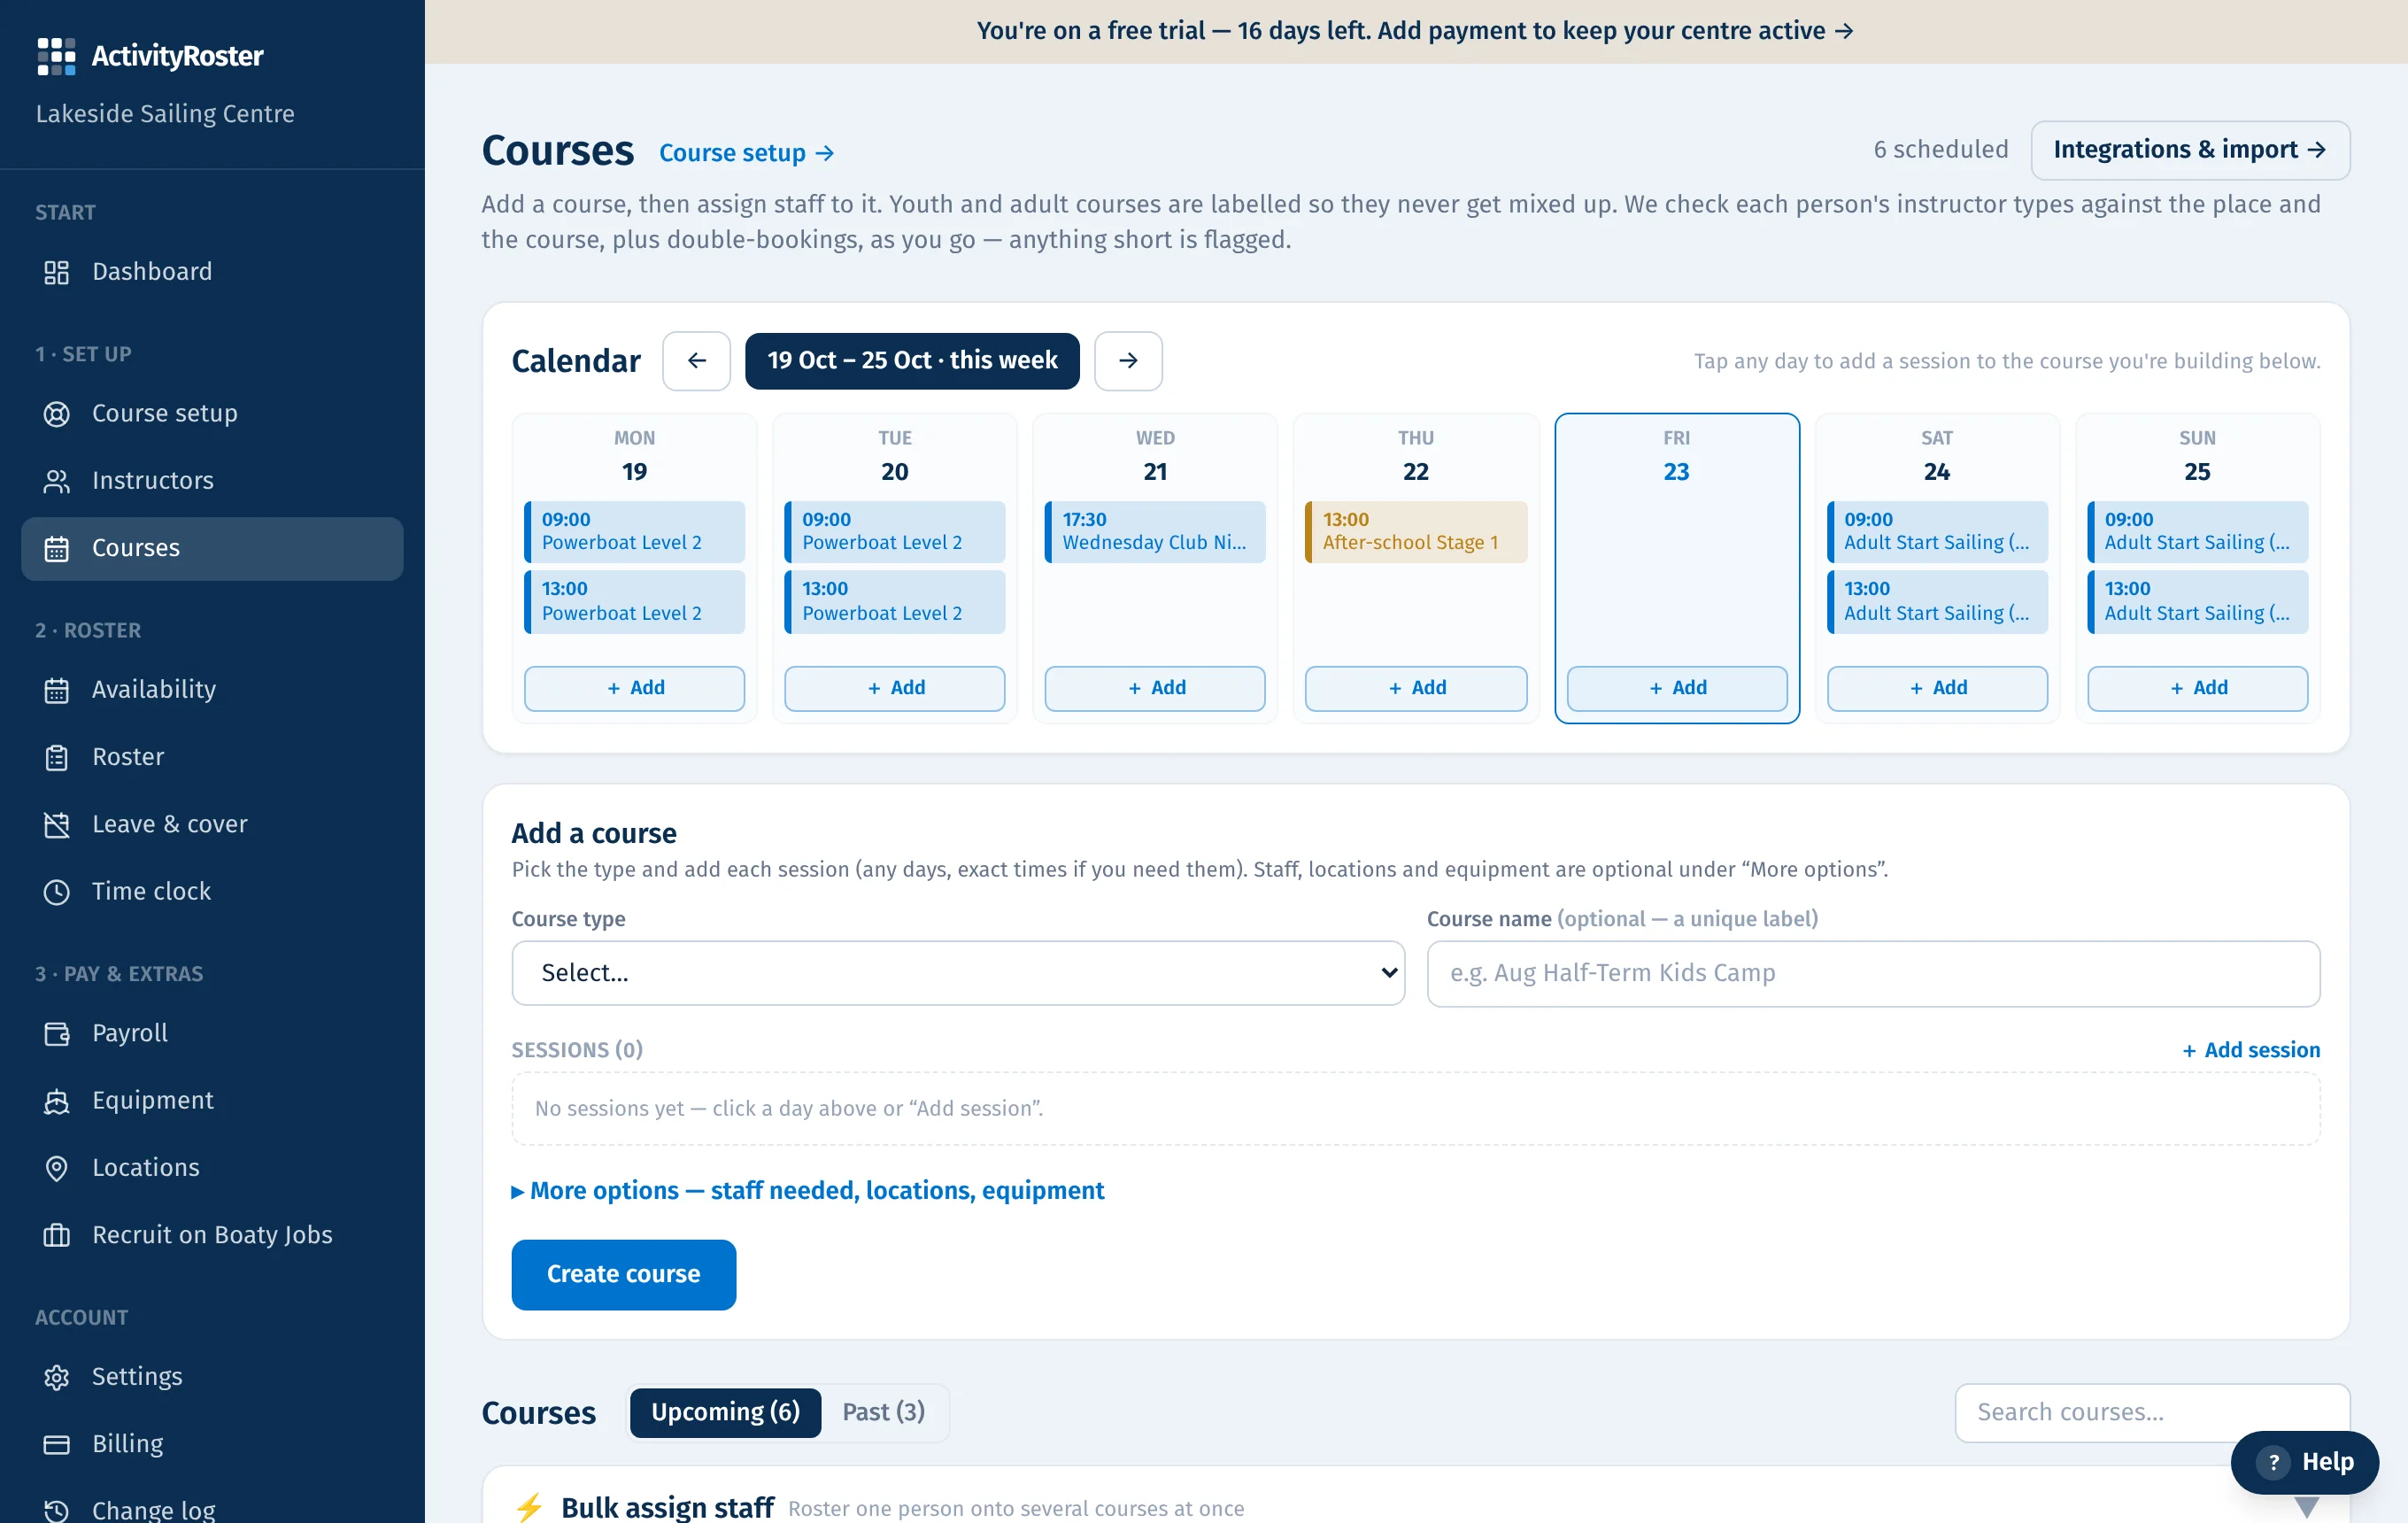
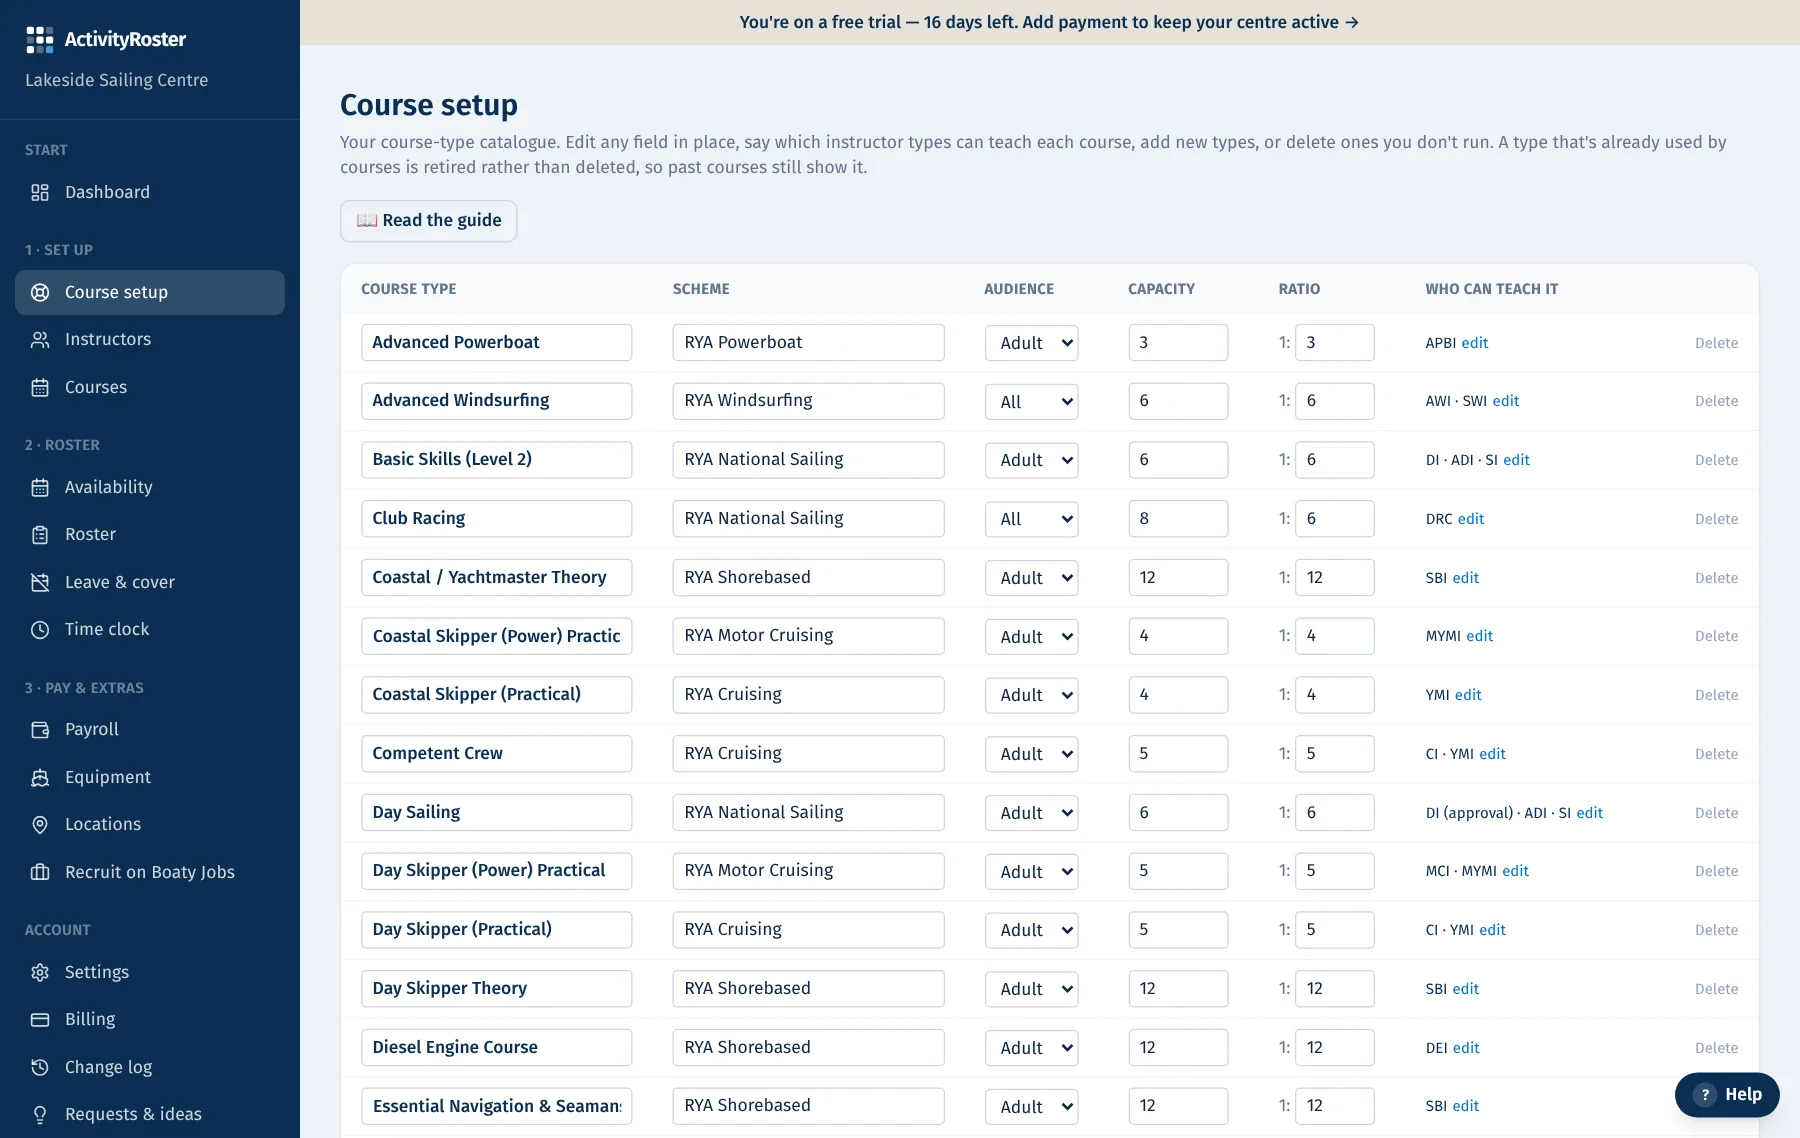
Screens from a made-up centre. Click any screen to see it full size.
Open Courses. At the top is the planner: a week calendar plus a builder. A course is one thing (e.g. “Aug Half-Term Kids Camp”) made of one or more sessions on whatever days and times you like.
Create a course
- 1Give it a name (optional but recommended — it makes the course unique and easy to find).
- 2Pick the course type (this sets the RYA scheme, the ratio and which instructor types can teach it).
- 3Add sessions — click a day in the calendar, or use “+ Add session”. Add as many as you need: e.g. two on Saturday, one Monday evening, one Wednesday.
- 4For each session set the slot (Morning/Afternoon/Evening), or tick “Exact times” to set a precise start & end.
- 5Open “More options” if you want to say who's needed (e.g. 2× Dinghy Instructor and 1× Assistant Instructor: the list shows the instructor types that teach the course, with “Other instructor type…” for the rest) or tick the locations and equipment the course uses — all optional.
- 6Click “Create course”.
Staffing one day differently
People are put on the whole course by default. On a multi-day course you can change a single day: on the course page each session lists who's on it, with “skip this day” next to anyone who isn't needed that day and “+ add for this day” for one-day cover. Open shifts are filled this way too, so cover for one session never puts someone on the whole week. The roster, the PDF, the emergency sheet, payroll and the app all follow.
Staffing: one panel
Each course has a single Staffing panel (on the course page, and under 👥 on the course card). Enter the students booked; it shows what the ratio from the course type implies and can suggest the places, in the course's lead instructor type. Adjust the places (say, 2 × Dinghy Instructor and 1 × Assistant Instructor) and the number of staff needed follows from them. If they fall short of the ratio, the panel says so. See “Places on courses”.
When two of you are editing
If someone else changes a course's staffing, locations or kit after you opened the page, your save is stopped with a note saying who changed it and when, rather than quietly undoing their change. Reload, check what they did, then make yours. Pay lines on the payroll page work the same way. If two of you put the same person on two overlapping courses at the same moment, the second booking is taken back out and you're told. Saves are all or nothing: if the connection drops part-way, nothing has changed and you can simply try again.
Manage a course
- Open a course to rename it, change its status (draft, scheduled, confirmed, completed, cancelled), set how many students are booked (this drives the ratio check), add or remove sessions, and assign instructors.
- The search box above the list finds a course by its name or type, in Upcoming or Past.
- If your course list is ever empty (everything unticked in the setup wizard), the Courses page offers “Restore the course list” to bring your standard list back.
- Run more than one kind of activity (RYA and PADI, say)? At the bottom of Course setup, add the other activity's course list and instructor types to yours; nothing you already have changes.
- Each course card shows its audience (youth/adult), the date/times of its sessions, and its staffing status (covered / under-staffed).
- Open a course card to see each place it needs and who is in it, e.g. “Dinghy Instructor 1”, “Dinghy Instructor 2”.
Course types: your regular list vs one-offs
- The course-type dropdown shows only your regular list — the types you run all the time.
- Running something unusual? Pick “+ Other (type it in)…”, type the name and tick who can teach it. It's a one-off and stays off your list, unless you tick “Add to my regular course list”.
- Course setup lists one-off types separately. Click “Add to list” to make one regular, or “Move courses to…” to file its courses under an existing type and remove the duplicate.